Today I went to the radio flea market in Bladel. Just like last year, I found some good stuff. Only this time, the location wasn’t the best. Parking was difficult. The radio market was divided into lots of small rooms. I’m not sure if I saw everything.
My purchases:
2 DC Motors with gearbox
Atrix MPM-1010 Power Meter
Chroma 66202 Power Meter (I had already bought the Atrix when I came across the much better Chroma)
After 5 years I went to the radio flea market in Bladel again. The market is now outside, luckily the weather was good. It felt like a radio market like they were a few years ago again, lots of stuff at reasonable/low prices.
What I bought:
Sorting box with variable resistors
3-fold ampere meter (I want to make a clock out of it)
For some time I had project boxes and storage boxes loose on the floor. Therefore I decided to build 2 cabinets to solve this problem.
First for the sorter boxes I build a cabinet with drawers on the bottom and on top shelves for the boxes. In the big space I put some old drawers.
For my project boxes I made a cart that sits next to my desk. In this I have 5 project boxes. (I will now try to finish my running projects and then limit to 5 projects at the time.) Next to the project boxes is space for SMD storage containers, These are placed on an angle because the cart would otherwise become too wide. On top there is space for 12 storage boxes for frequently used components and parts (Heatshrink, AMP connectors, ferrules, etc.).
The switch that I use to switch off my hobby desk broke again for the second time. The contacts where welded shut. After replacing it again it was time to fix the cause of the issue. To limit the current I used an altered schematic from CircuitsOnline.
After my incident on my safety transformer project where the resistors burned I did not fully trust this circuit. Therefore I have added a thermal protection that switches the output power off when the resistors get too hot.
I build the circuit in a remote controlled socket enclosure. To mount the parts I used some glue and tyraps.
Some time ago I bought another 3D printer, this time one that uses resin to print. However after printing the parts are not full strength yet. To solve this the parts need to be put in UV light. This can be done outside in the sun or in an UV curing device. Since the sun does not always shine when I’m printing I decided I need a UV curing device.
I did some research on this, but only saw devices that where either much too expensive, or the quality too low or very unpractical. At this time I was thinking why not convert an old microwave oven. It has a rotating disk to put the prints on, it has a timer and it is nice and enclosed.
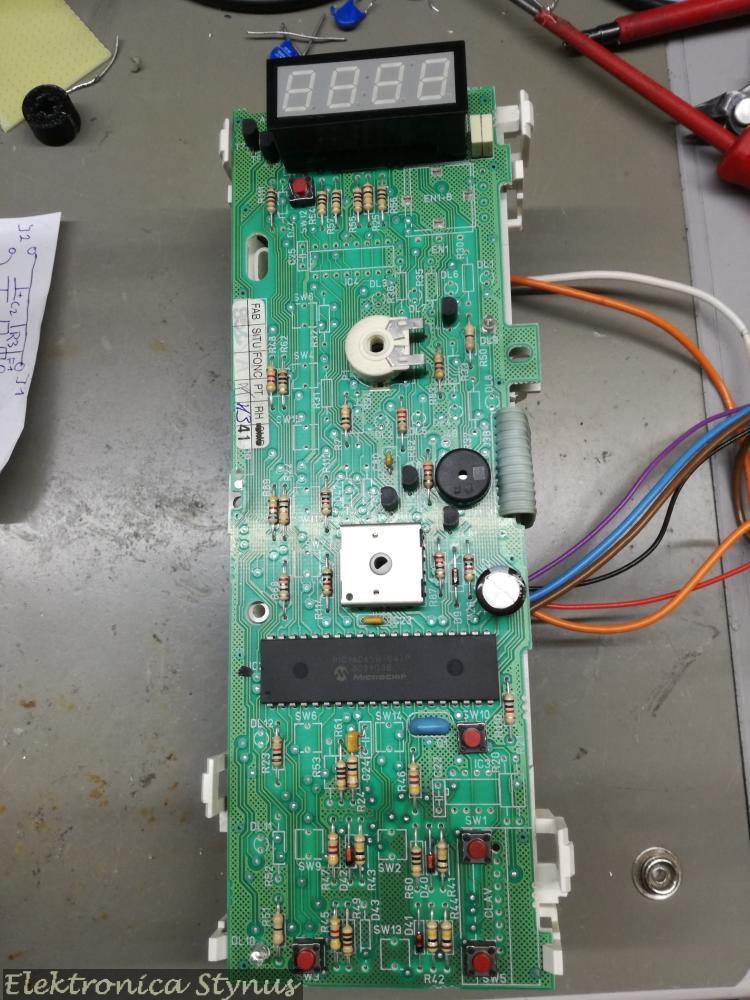
After asking around I got a defective microwave oven. The tube was defect. However this does not matter for my use-case since I replaced the MOT and tube with a LED driver and UV LEDs.
Now in theory it should already work, but I wanted to make it more custom. I saw that the driver board contained an old PIC16C65B microcontroller. This is a one time programmable, so I replaced it with an (also old) PIC16F877A. Now the timer can be equipped with custom firmware.
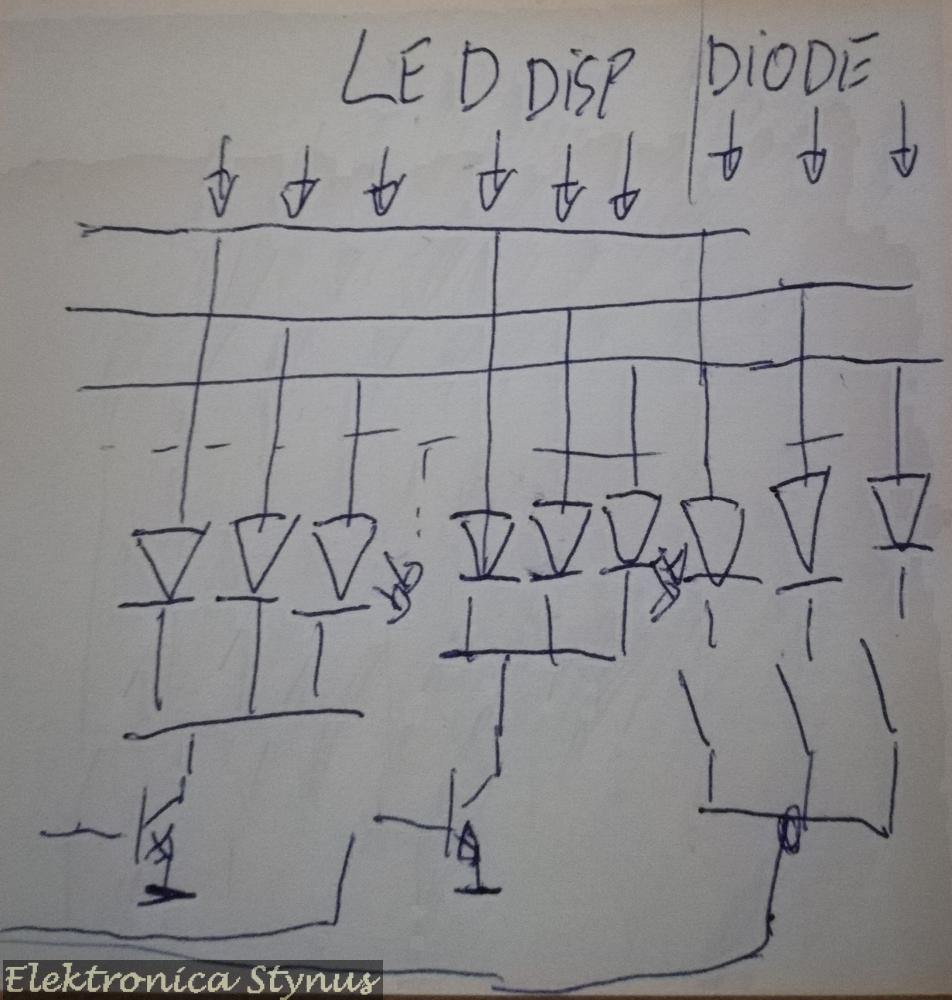
Only now the difficult part started. The pins that go to the 7 segment displays do not only drive the displays, they also read out the switches. This took a lot of searching and reverse engineering of the circuit board. I do not have a full schematic off it since I only did what was needed. But I did make a sketch to make this more clear:
The code I wrote for the microcontroller:
The result:
Please accept YouTube cookies to play this video. By accepting you will be accessing content from YouTube, a service provided by an external third party.
We use cookies to ensure that we give you the best experience on our website. If you continue to use this site we will assume that you are happy with it.